How to Move Servers in Cloudways Hosting
Cloudways Hosting allows its users to move servers between different accounts with little hassle. Here is a detailed step-by-step guide on how to move servers in Cloudways Hosting.
Step 1: Select The Server You Want to Move
Log in to your Cloudways Hosting account and click on the “Servers” tab in the top menu. Select the server that you want to transfer to another account.
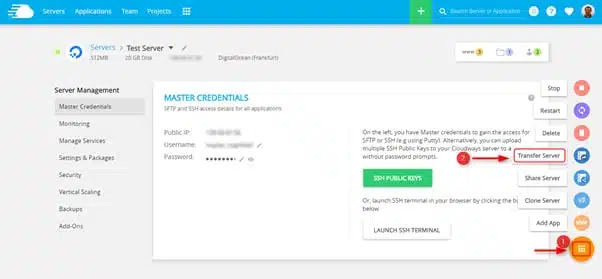
Step 2: Navigate to “Transfer Server”
Click the “Transfer Server” button and enter the target’s account’s email address.
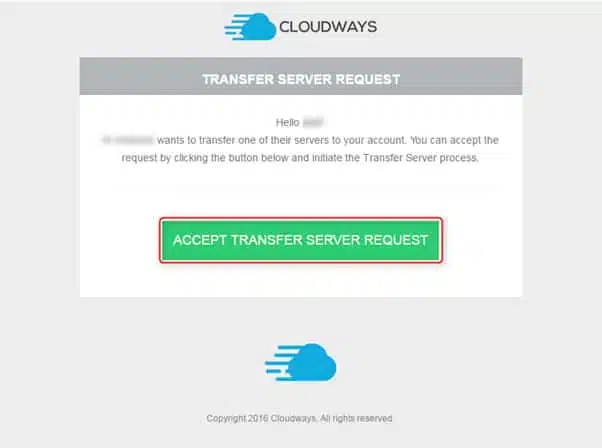
The target account will receive an email notification requesting permission to transfer the server. They will need to accept the request in order to complete the transfer.
Step 3: Wait for The Transfer to Complete
The transfer process will not be instant depending on the number of applications on your server but it may take up to 48 hours. Once the transfer is complete, you will be able to access and manage your server from the destination account.
Step 4: Test and Verify The Server
Before you begin using the transferred server, it is important to test and verify that everything is working as expected. This includes checking the server’s performance, connectivity, and any applications or services that are running on the server.
Can You Cancel a Server Transfer in Cloudways Hosting?
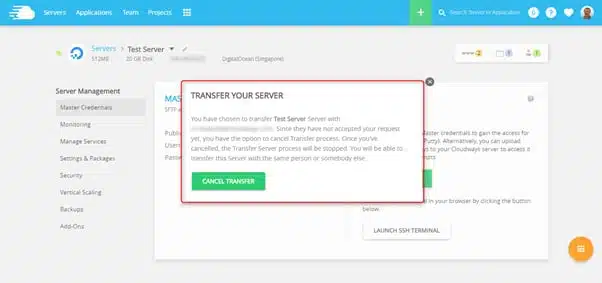
Yes, you can cancel a server transfer in Cloudways Hosting by clicking on the “Cancel Transfer” button in the top menu. This will stop the transfer process and the server will remain in the source account.
Final Thoughts: Moving Servers in Cloudways Hosting
To sum it up, moving servers in Cloudways Hosting may take some time. Following the steps mentioned above, will help you manage it without much difficulty and save your money as well as time.


