How to Migrate your Website to Cloudways Hosting
Migrating your website to Cloudways hosting comes with a range of benefits. For starters, Cloudways hosting is faster and more reliable than traditional hosting, so your website will load faster and be more reliable.
Here is a quick guide to help you migrate your website.
Use the Cloudways WordPress Migrator Plugin
If you use WordPress for your website on another provider, then migrating to Cloudways Hosting will be a breeze. You just need to install the Cloudways WordPress Migrator Plugin. Just follow these steps and the process will be over in a jiffy.
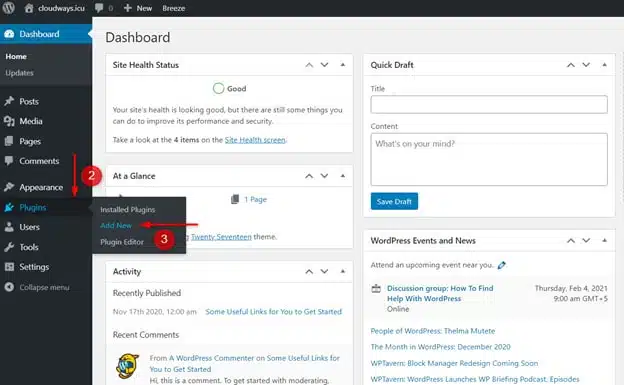
1. Visit the plugins section of your WordPress admin panel and click ‘Add New’
2. Search for the Cloudways WordPress Migrator Plugin and install the plugin. Be sure to also activate the plugin so that you can start using it.
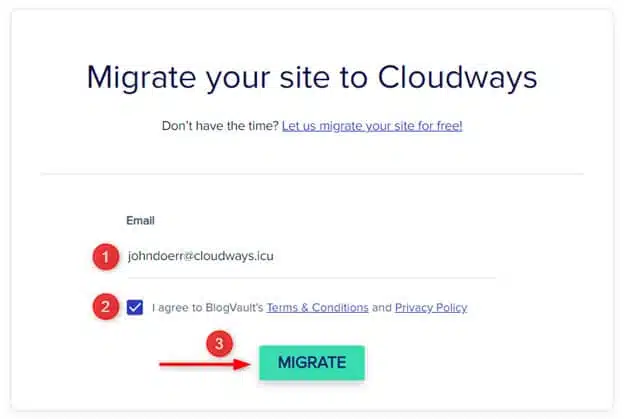
3. Start the migration process by visiting the Cloudways Migrator plugin section on your admin panel. Here you can start off the migration process by entering your email address and consenting to Cloudways’ terms and privacy policy. Click migrate to start the process.
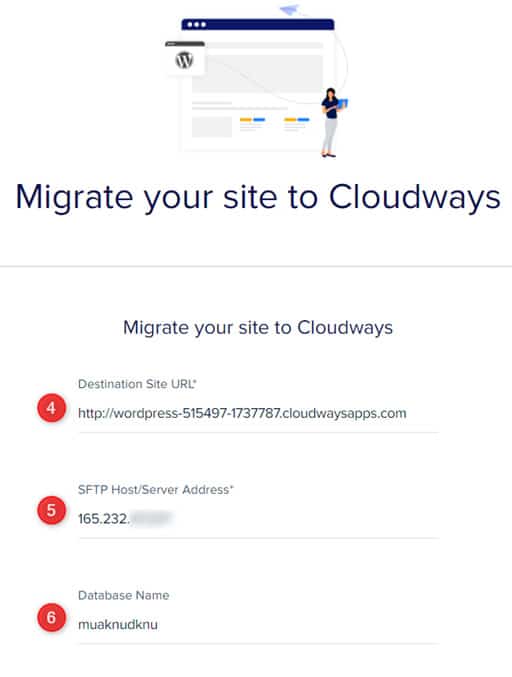
4. Enter the details of your destination website to ensure that the process is complete. You will be required to input a couple of details include the URL of your destination site, the SFTP server address and your database name.
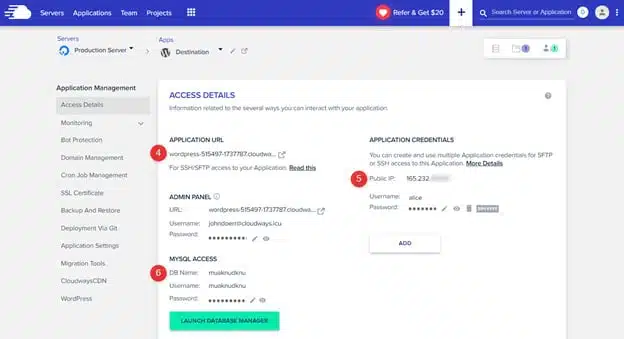
To find this information, go to your server and click on the www icon. Click on ‘Destination’ and you will find some details including the destination URL, IP Address and the name of your database.
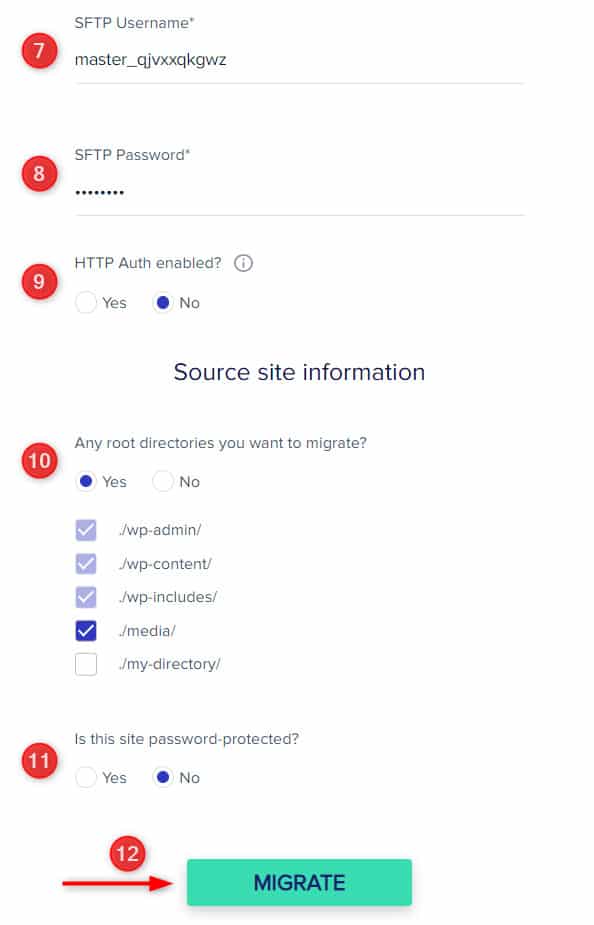
5. Input your SFTP details. You will have to subit your SFTP username and password. You can also choose to migrate your root directories that are non-WordPress. Click on the other alternatives on the page and complete the migration process by pressing ‘Migrate’
Request a Managed Application Migration to Cloudways
Another alternative when looking to migrate your website is requesting for a managed application migration from Cloudways. The good thing is that every Cloudways account gets a free application migration request where the Cloudways staff will handle every aspect of the migration. Here is how to request for a managed migration.
1. Deploy target application.
The first step is to log into your Cloudways Hosting account and deploy the target application that you wish to migrate. If you are looking to migrate a WordPress website, then you should launch a WordPress application on an existing or new server.
2. Launch the Application Migration Wizard.
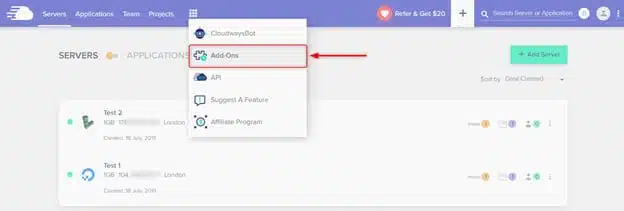
Proceed to the grid menu on the top of your dashboard and press the Add-ons button. This will open up a number of add-ons including the application migration add on.
Click on the edit button on your far right to launch the application migration wizard.
3. Choose target application and enter your website details
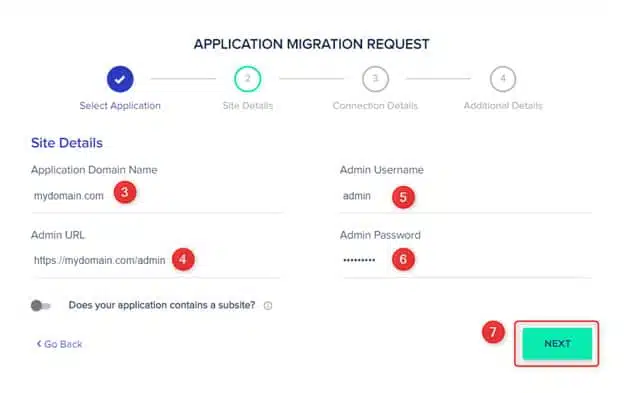
Once you select your application on the migration wizard, you will have to input some details of your website. These include your website’s domain, URL of the admin area and log in details. Press next to launch the request.
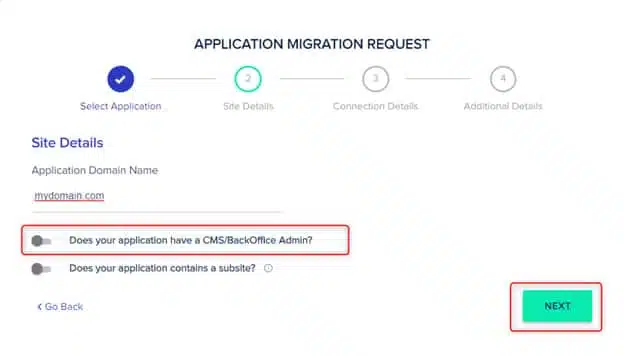
You will also have to input some site details if perhaps your website has a CMS or backend that will laso need to be migrated.
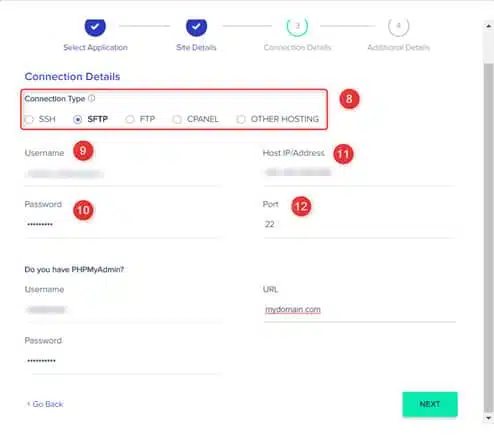
After this, you will have to choose the connection type which is how you want Cloudways staff to access and send data or files from your website. There are five types of connections so you will have to use the one that you work with.
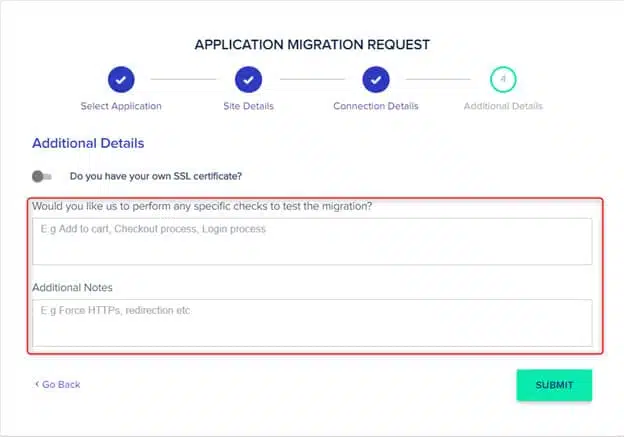
4. Add any additional details and submit the request.
Here you can add any additional information that you think will be useful when conducting the migration process.
Final Thoughts
Migrating your website to Cloudways Hosting is not as complex as it sounds. If you are using WordPress then you can get the Cloudways Migrator Plugin, which will make the process seamless. Alternatively, you can make a request to Cloudways staff to help you migrate your website as long as you give them all the necessary details. Just follow the steps above and your site will be migrated to Cloudways Hosting in no time.
