How to Set Up Cloudflare in Cloudways Hosting
Cloudflare is essential if you want to protect the security of your website. This post will look at how to set up Cloudflare in your Cloudways Hosting account. Here are the steps you need to take to get started.
Navigate to Dashboard
After logging into your Cloudways Hosting account, you will be taken to the dashboard, where you can select the server you wish to add Cloudflare.
Select the Server You Want to Add Cloudflare To
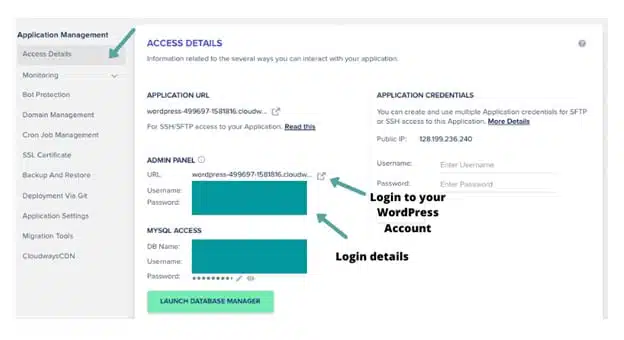
You can either select an existing server or create a new one. After this is done, click on the Access Details tab. This will show you the SSH and SFTP credentials of the server.
Once you have selected the server, go to the Applications tab and click Add Application. Here, you need to choose the type of application that you want to install and its version. Once you have done this, click on the Install button.
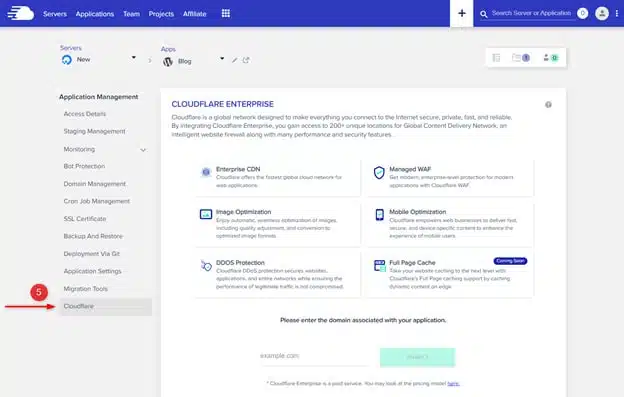
Now, you need to select the server that you want to add Cloudflare to. To do this, click on the Modify Application tab. This will open a new window where you must scroll down and click on the Cloudflare icon.
You will be taken to the Cloudflare tab, where you will be asked to enter your domain name and choose a plan. Choose the Free Website plan or any other plan that suits your needs. Click on the Add Domain button and confirm the action. You have successfully added Cloudflare to your server.
Click on the Add Domain Button
Once you have entered your domain name, click on the “Add Domain” button to continue. This will add your domain to Cloudflare and create a Cloudflare account.
Once you have clicked the Add Domain button, Cloudflare will prompt you to enter information about your websites, such as its IP address and language. Make sure to enter this information accurately and click on the “Continue” button.
After you have successfully added your domain, Cloudflare will present you with a page that contains all the necessary information to set up your site on Cloudflare. You should also see an area where you can add custom DNS records. In the next step, you will add the necessary DNS records to your domain.
Enter Your Domain Name and Select the Free Website Plan.
When you have selected your server, you will be taken to the Domains Tab. Here, click on the “Add Domain” button. Enter your domain name in the appropriate field on the next page and select the Free Website plan.
You will then be taken to the Cloudflare integration page where you can manage all the DNS records related to your domain. Select your desired plan and click “Continue.” You will now be able to handle the DNS records for your domain.
Click on the DNS Tab.
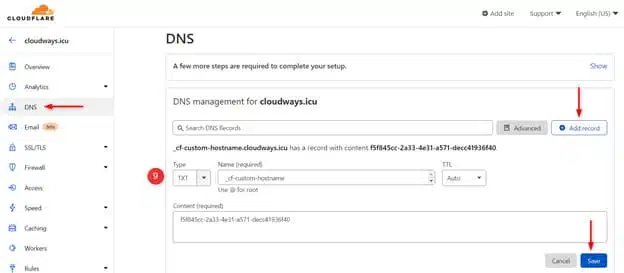
Once you have entered your domain name and selected the Free Website plan, click on the DNS tab.
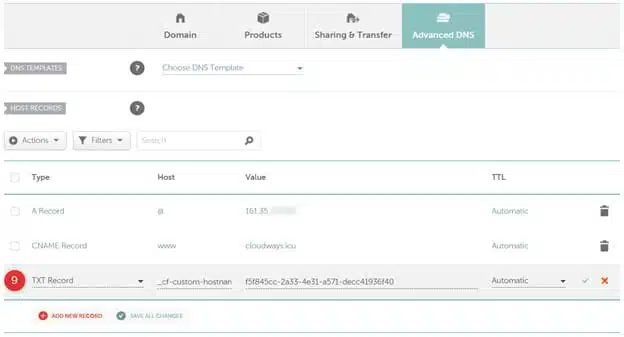
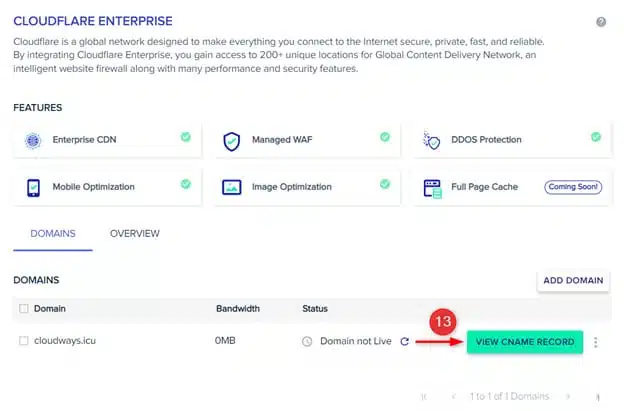
The CNAME record tells Cloudflare which domain you want to direct requests. Enter the domain name in the “Name” field and select “CNAME” in the “Type” field. Then enter the target domain in the “Value” field.
The next step is to add the A record. Enter the IP address in the “Value” field and select “A” in the “Type” field.
Finally, you will need to add an MX record. Enter the domain of your email server in the “Value” field and select “MX” in the “Type” field.
Once you have added all the records, click the Save button at the bottom of the page to save your changes. Now, all requests to your website will be routed through Cloudflare, and your visitors can access your site more quickly and securely.
